Setting up WordPress locally means that you can run WordPress on a local server on your computer, and it will be visible only to you. The server is on your computer. You can install it, and it will be visible only to you and not on the internet.
There are many reasons you would need to create a local setup. It is the safest way if you need to:
- Test new themes and plugins
- Learn WordPress framework
- Make code modifications
We are already explained how a local WordPress installation can help you when you need to move to a new theme. Generally, a local installation helps test and develop a website before buying a domain name and server. Also, if you already have a live website, you don’t want visitors to see a half-made or crashed website. Last, you’re not obliged to buy a domain and hosting to test this framework for learning purposes.
Do you want to start installing WordPress on your computer? You can set up your WordPress installation locally using many ways that you can find out here. We are here to show you how to do it on Windows using XAMPP. The most common application to set up a local web server on Windows, Mac or Linux.
Installing XAMPP
In order to run WordPress, you will need a PHP and MySQL server. XAMPP is what you need. Plus, it is easy to set up.
Firstly, you download XAMPP and start the setup wizard. The installation is pretty easy; remember that for WordPress, you just need to install MySQL and PHPMyAdmin components. In the end, click to launch the Control Panel.
What you need to run WordPress are Apache and MySQL.
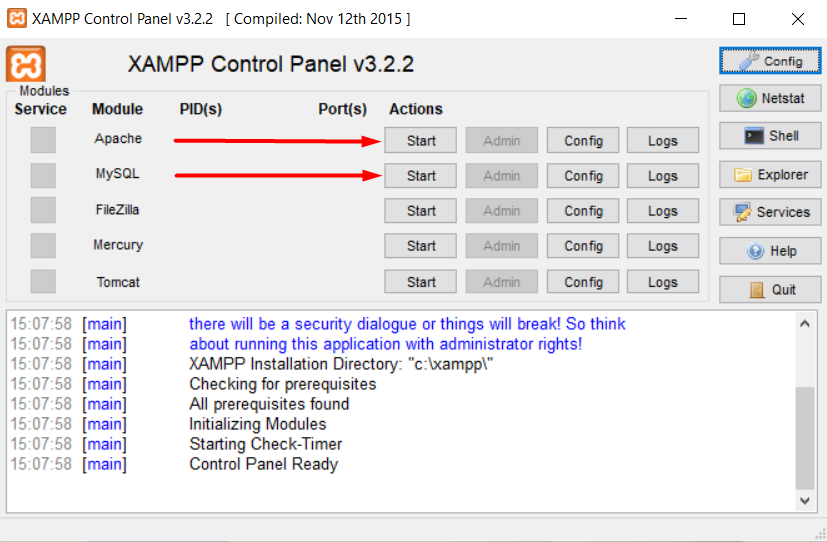
Once you confirm they are both running, you can continue and install WordPress too.
Installing WordPress
Download
It’s time to download the latest WordPress version from WordPress.org.
Once you download it, move it under your XAMPP folder to the location where you’ve installed it. By default is in the C://xampp directory and open htdocs folder. There you should create a new folder that you will use for your WordPress installation. You can name me as you like. We will use the “wordpress” name folder.
Now, you have to extract the WordPress download zip file from the folder you’ve just created.
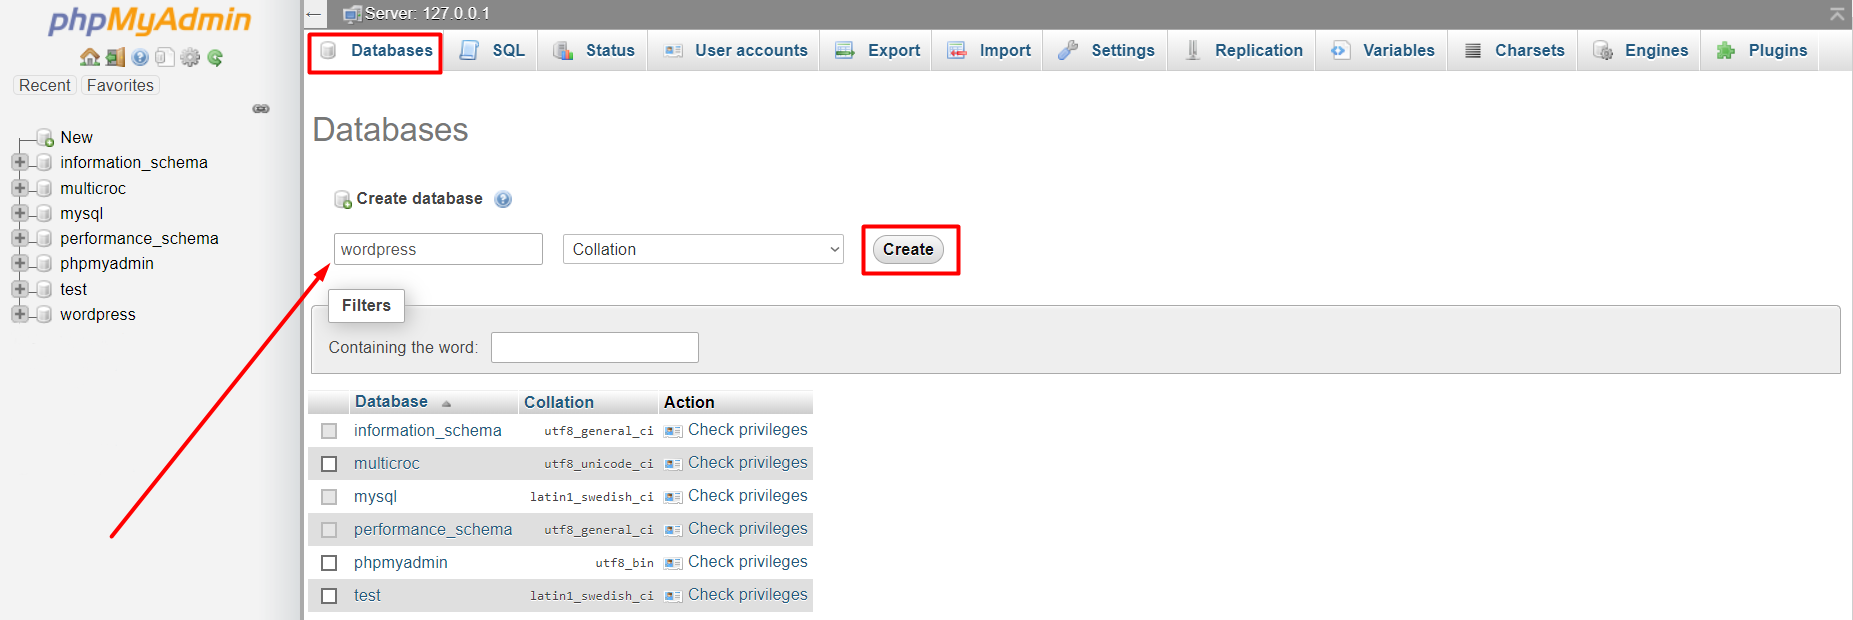
Create the database
Before moving forward, you need to create the WordPress database by yourself. In XAMPP, you can reach your databases by typing the localhost/phpmyadmin/ URL in your web browser. In the panel, you need to select the Databases tab on the menu. Then fill in the same name for your database with the folder name you’ve created previously inside the XAMPP subfolder.
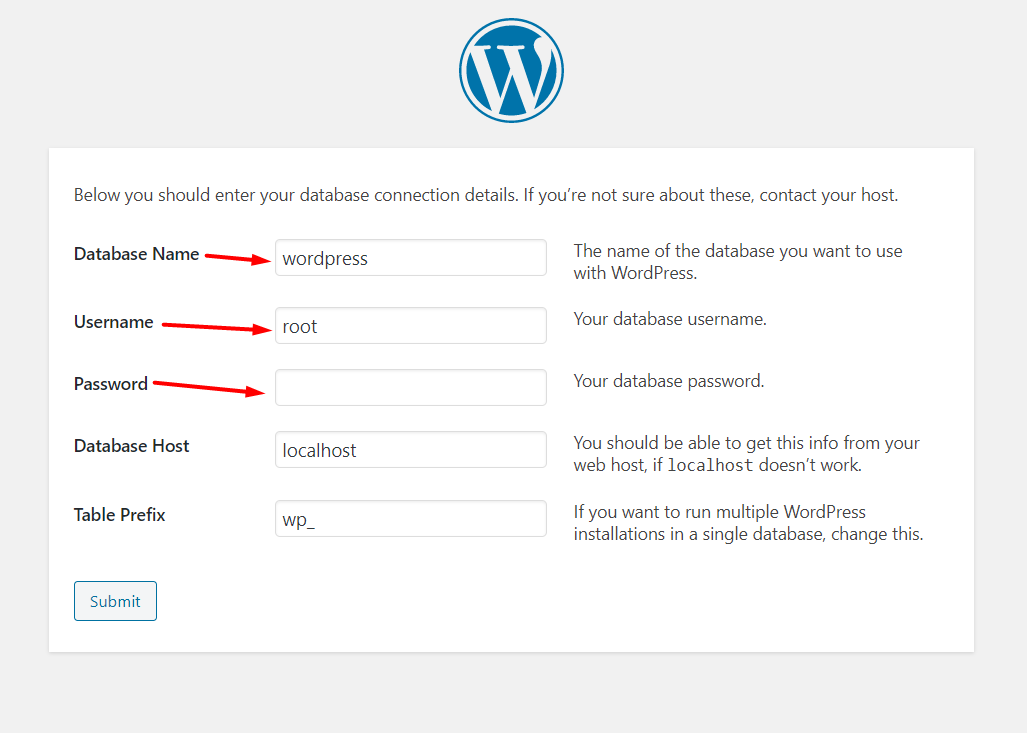
Install
Now visit localhost/wordpress where “wordpress” you replace with the database name you’ve created. Start the WordPress setup. You will need to add your database name, username and password. Fill in accordingly and click the Submit button. By default, you have the following values for username and password.
Then, you need to give the website information, such as the Site Title, username and password for your admin account. Continue, and WordPress installation begins!
When the installation is complete, you can access your dashboard. You will find it in the following URL: localhost/wordpress/wp-admin where “wordpress” is your database name.
There you are! You have set up WordPress locally. 🙂
After the installation
Your installation has been completed successfully, and you’re logged in to your Dashboard. Now you can start using a new theme and plugins and create your website step by step.
However, in WordPress, you usually need to use a premium WordPress theme to easily create a well-designed and multi-functional website. Themes often require some minimum Server Settings to work, all their features as they should. So, you will need to modify some of your server settings manually. For example, if you use our latest multi-purpose theme MoveDo you need to adjust values such as:
- WP Memory Limit: You can adjust value under wp-config.php file in your wordpress installation folder: define(‘WP_MEMORY_LIMIT’, ’96M’); and define( ‘WP_MAX_MEMORY_LIMIT’, ‘256M’ );, this one before wp-settings.php inclusion.
- PHP Memory Limit: Adjust value to memory_limit, under php.ini file in your XAMPP folder (memory_limit=256M).
- PHP Max. Post Size: post_max_size value under php.ini file (post_max_size=128M).
- PHP Upload Max. Filesize: upload_max_filesize value in php-ini file (upload_max_filesize=32M).
- PHP max_execution_time: max_execution_time value in php.ini file (max_execution_time=300).
- PHP Max. Input Variables: max_input_vars value in php.ini file (max_input_vars =3000)
Furthermore, if you need to create a network of websites in the same installation, you can make your WordPress Multisite. You can simply add this line: define( ‘WP_ALLOW_MULTISITE’, true ); in your wp-config.php file above the line “/* That’s all, stop editing! Happy publishing. */”. Last, login to your Dashboard and go to Tools > Network Setup. Click “Install” and then follow the instructions about adding shortcodes in your installation files.
All these, we hope, will help you create and use WordPress locally with zero problems!